This allows you to scan all store paperwork at once without having to make copies of things like receipts and deposit slips. Scanning to email using this method will help retain image quality and legibility since all documents will only have to be scanned once. Before you start, you’ll want to make sure you have all your documents in order since it’s a little harder to keep track of what’s been scanned using this method.
YOU SHOULD NOT HAVE TO CHANGE ANY OF THE SETTINGS. YOUR PRINTER IS ALREADY SET TO THE OPTIMAL SCANNING SETTINGS.
From the main menu:
Click Email
Input the destination email address
Place the first item on the scanning glass or top feeder. Receipts and other small papers will go on the scanning glass. Standard 8 1/2" x 11" papers can be scanned through the top feeder.
Press Send Email. Don’t worry- it won’t actually send anything yet.

Wait for the printer to finish scanning.
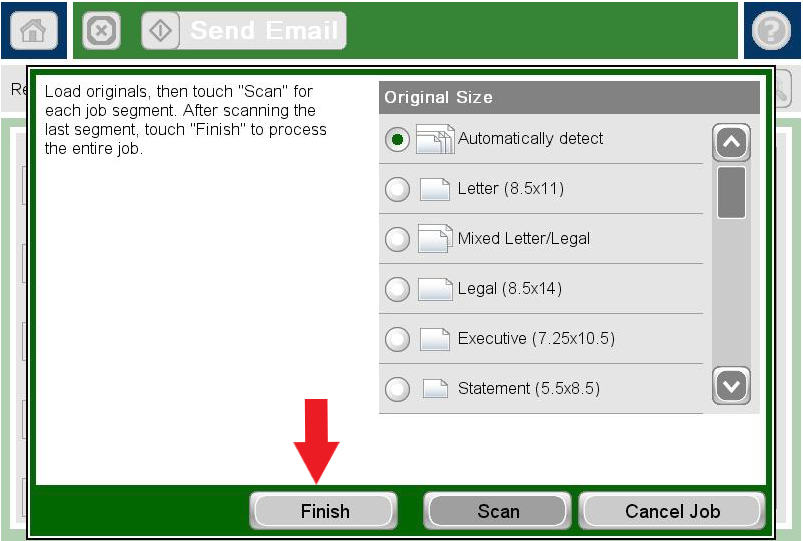
Once it finishes scanning the first item, it will prompt you to either Finish, Scan, or Cancel.
Place the next paper on the scanning glass or top feeder and press Scan.
After you’ve scanned that item, you will be prompted again to Finish, Scan, or Cancel.
Continue placing the papers and pressing Scan for each one until you've scanned everything.

Once you are done scanning everything, press Finish to send the email.
It will send everything in the order it was scanned and combine them into a single email. It is a good idea to double check the email to make sure everything is included before sending it to Accounting.

